Emma Email Marketing Platform
Training and information for NC State Emma users
On This Page
- Getting Started
- Glossary of Terms
- Training Videos
- Step-By-Step: Import Contacts
- Step-By-Step: Create a Campaign
- Personalization Fields
Getting Started
- To sign into Emma, visit go.ncsu.edu/emma.
- Sign in using your Unity ID. (Only select communicators in the college have access to send through Emma. Please reach out to [email protected] with any questions.)
- Note that once you are signed in, after a period of inactivity in Emma, you will be prompted to sign in again. The sign-in screen that appears will not work. You must navigate back to go.ncsu.edu/emma to sign in with your Unity ID.
Glossary of Terms
Below are a few key terms unique to Emma’s platform. The Audience and Campaign areas are the primary areas you will be working in.
- Audience: All of the contacts in your Emma account are collectively referred to as your audience. Additionally, using some of your contacts to create a group can be referred to as a “target audience” when chosen as recipients for a campaign or automation.
- Group: You will find Group under Audience. A Group is a user-created list of contacts in your audience
- Campaign: A marketing email sent to multiple recipients at once. A campaign can also be referred to as a mailing and Emma uses the two terms interchangeably.
- CYO: Code your own (CYO), in reference to email creation, means the capability to build an email from scratch with your own HTML code instead of using a standard or blank template with the drag-and-drop editor. This type of mailing is fully self-serviced and not supported by Emma Support.
You can find a full list of terms used in Emma here.
Training Videos
Step-By-Step: Import Contacts
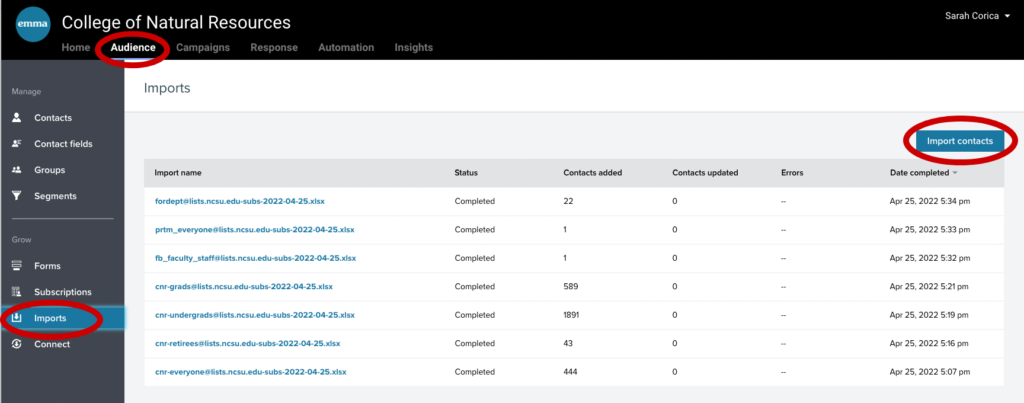
1. Import your audience
To begin, go to the “audience” category. Then select the “imports” section and click the “import contacts” function.
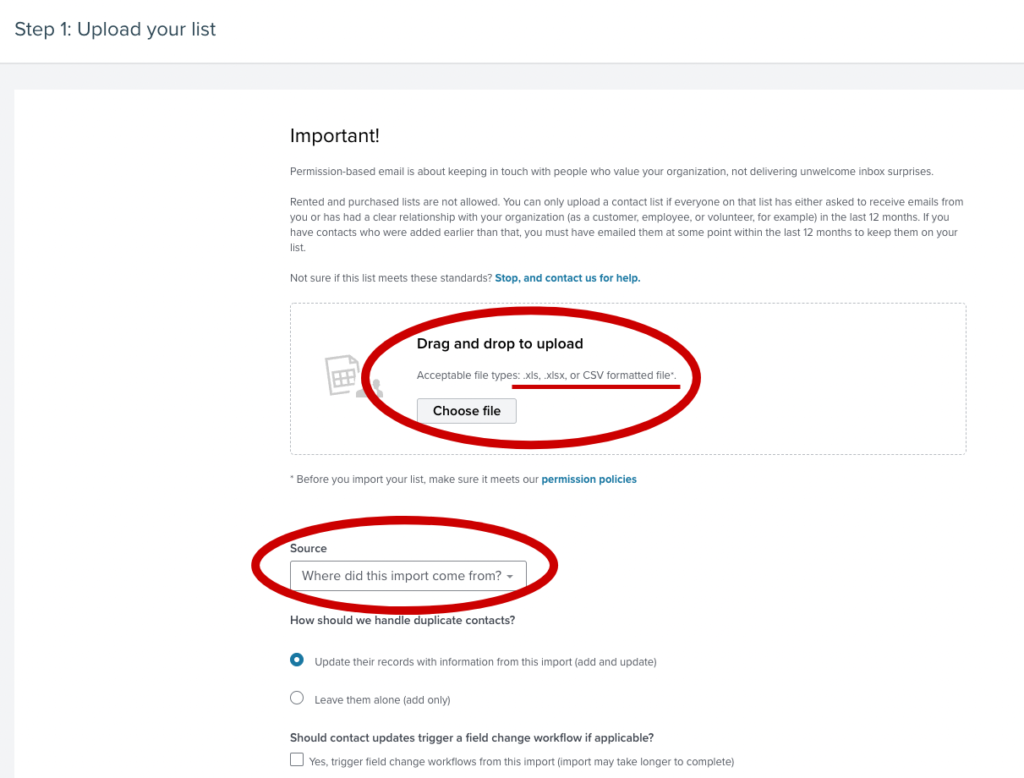
2. Import list and select audience sources
If the souce of your list does not appear in the drop down when you type in the field, add a new source. Options include: Advance, Slate, (Department name) list, ListMinder.
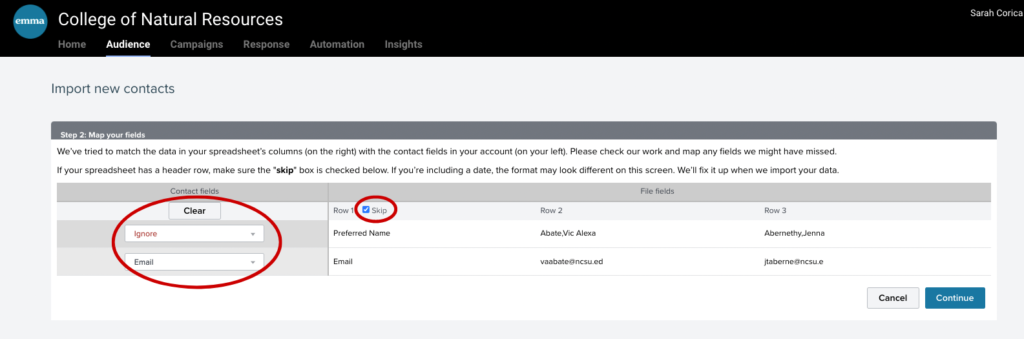
3. Import contacts and map to fields
Note that you must select the “skip first row” check box if your spreadsheet has row headers. If there is information on your sheet that is not needed, select “ignore” in the drop down to the left. Do not import information that will not be needed in Emma. The primary fields you should need are first name, last name and email.
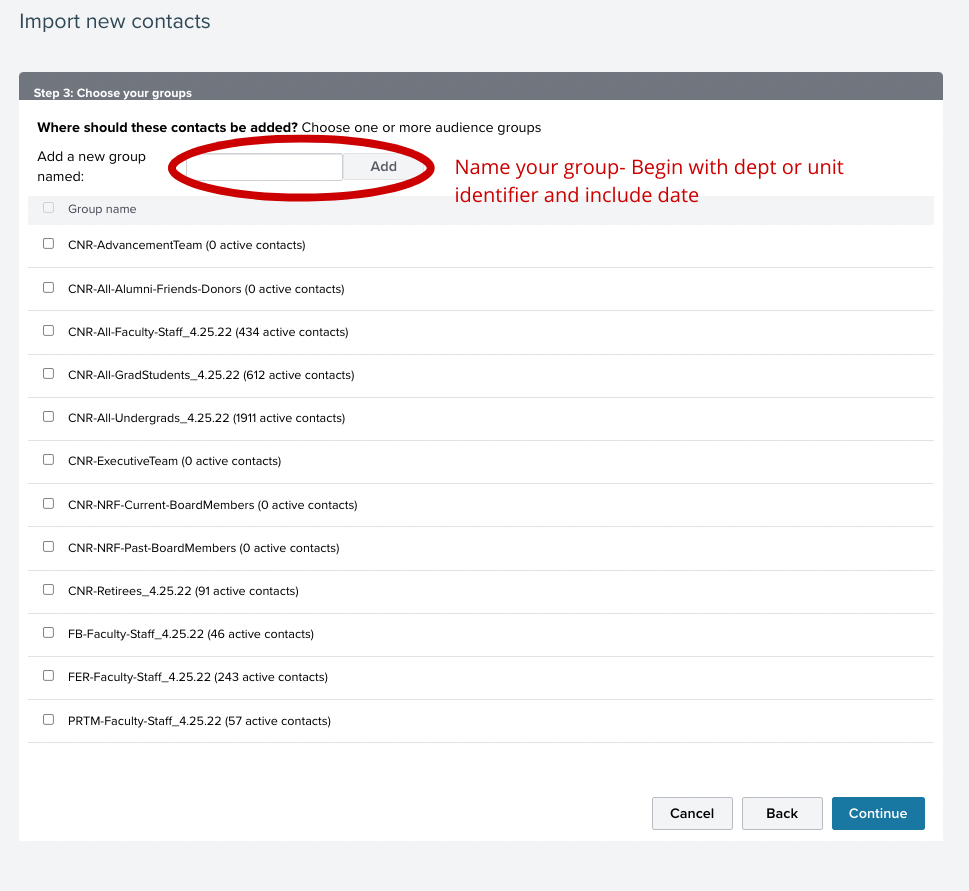
4. Create or select a group
5. Subscriptions – SKIP FOR NOW
This function allows recipients to unsubscribe from certain mailings without unsubscribing from all mailings. We are still in the process of setting this up.
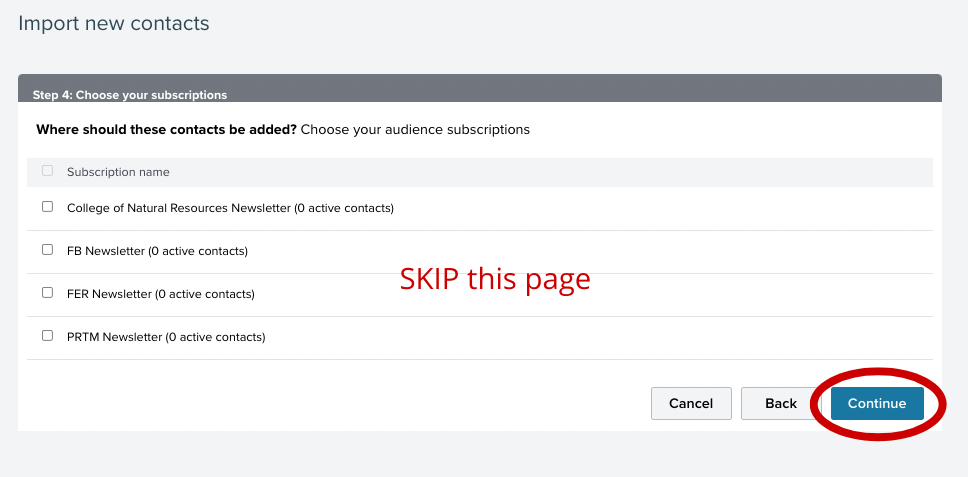
6. Complete import
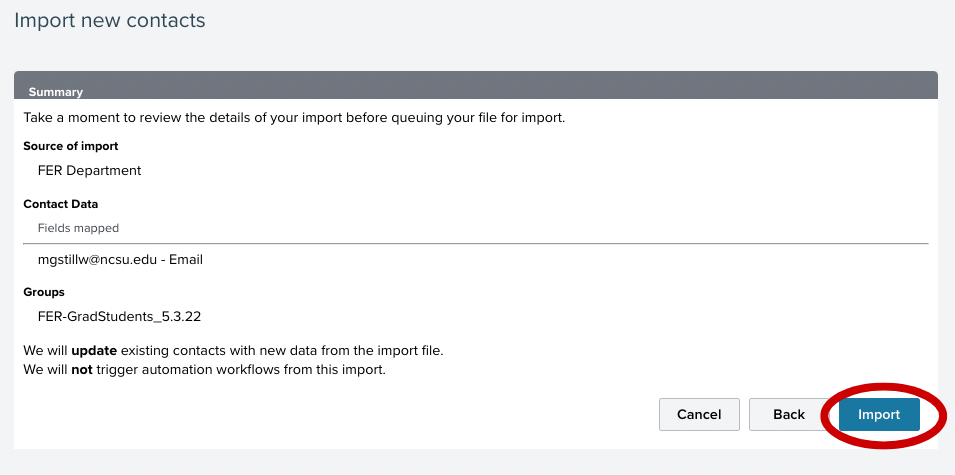
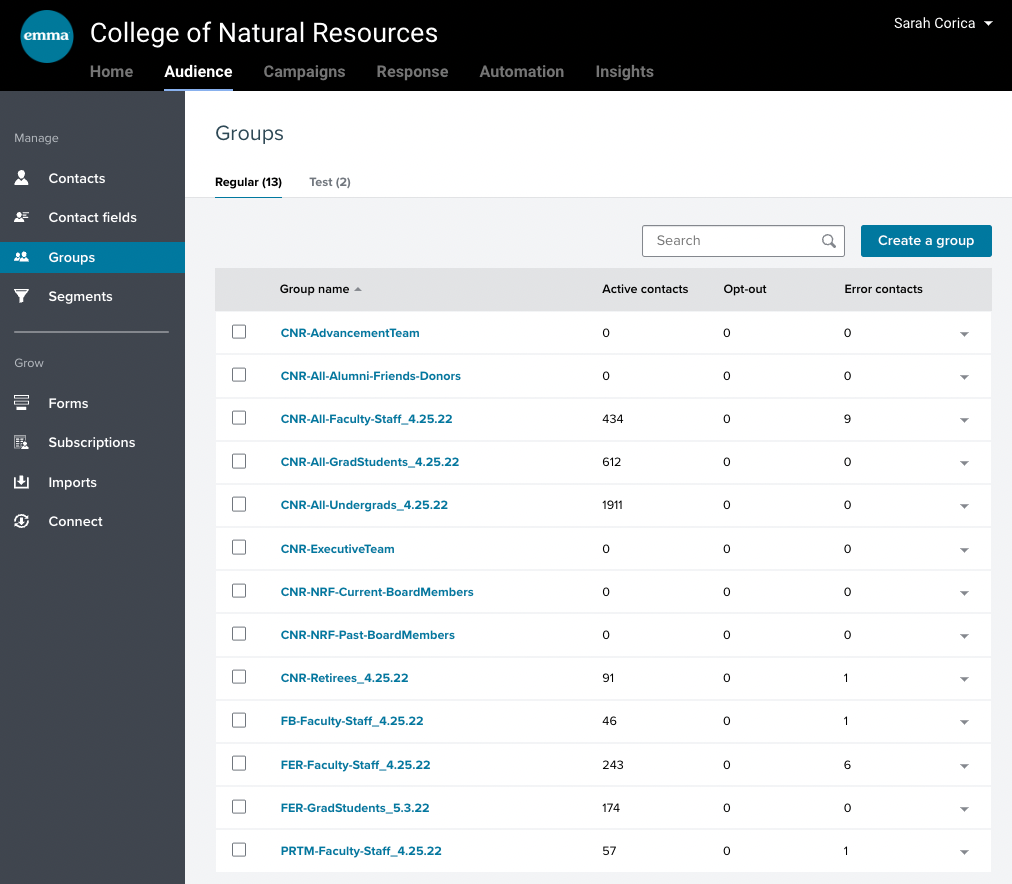
7. New list in groups
You will now be able to find your new contact list under the “groups” category. After importing a list, cross check the number of active contacts on the list. It should be the same as the number of contacts on the spreadsheet you imported.
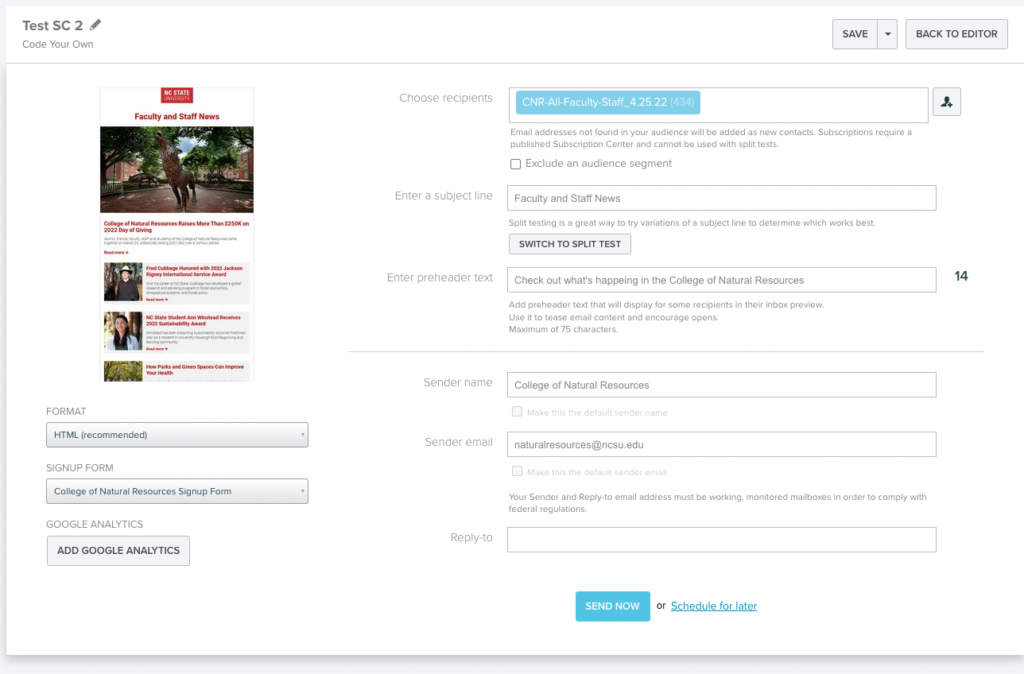
Step-By-Step: Create a Campaign
1. Build your email in the CNR Premium Email Generator
Prior to creating a campaign to send your email via Emma, build your newsletter, invitation, announcement, etc., in the CNR Premium Email Generator. Do not utilize the build from scratch/drag and drop feature in Emma to create your email. All CNR users are required to use the Premium Email Generator to create email communications.
- To sign in to the CNR Premium Email Generator account, go to: https://email.web.ncsu.edu/cnr-comms/wp-admin/
- Sign in using your Unity ID.
- Learn more and view trainings about the Premium Email Generator.
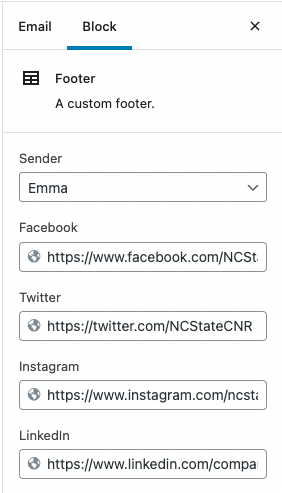
NOTE: When building your email in the Premium Email Generator, be sure to click on the footer of your draft and select Emma as the “sender” in the fields on the right under “block”.
2. Select “create a new campaign”
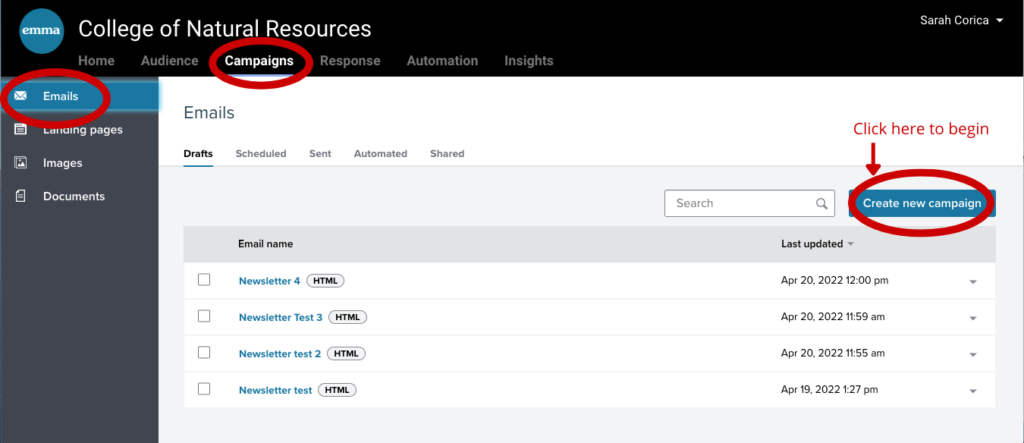
To create your campaign, go to the “campaigns” category and clicking the “emails” section. Then click the “create new campaign” function.
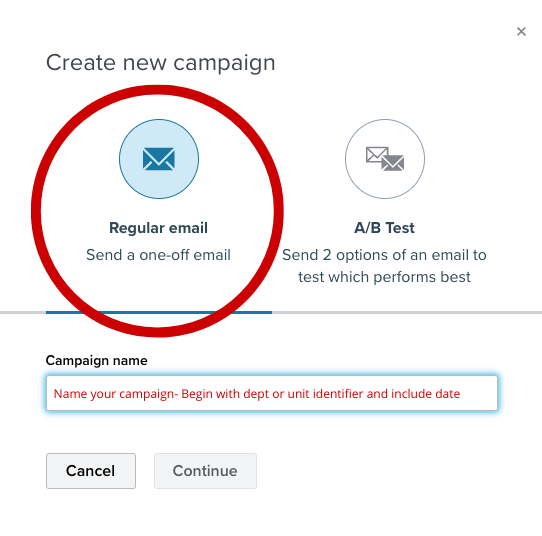
3. Select “regular email”
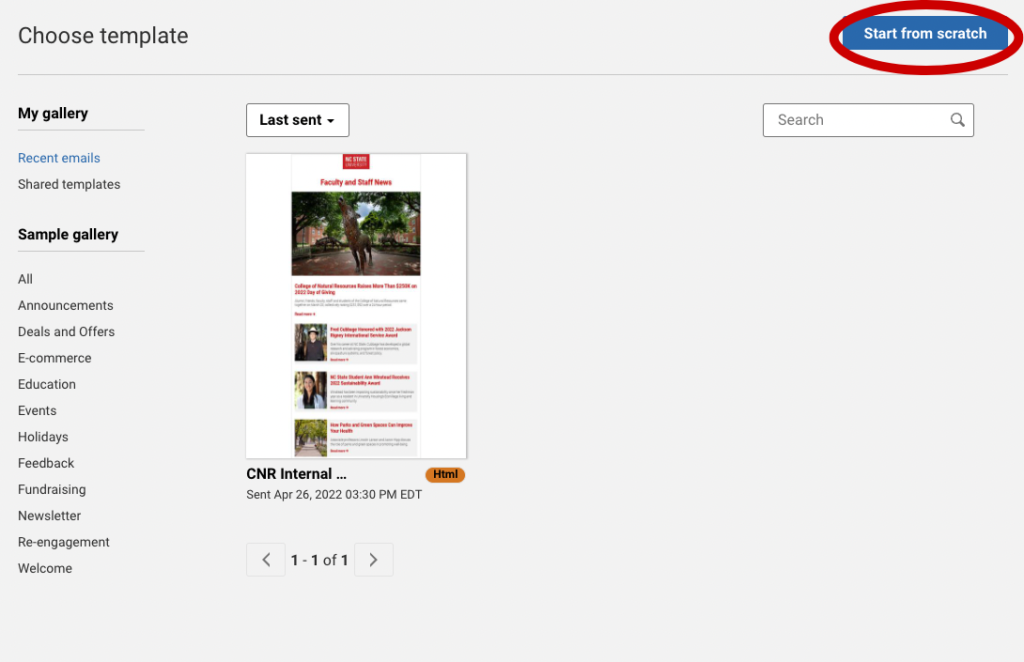
4. Select “start from scratch”
“Start from scratch” is how you import the HTML code from the email you created in the NC State Email Generator. Do not create emails with the Emma editor or use any of their templates. All Emma users should continue to use only branded emails created in the NC State Email Generator.
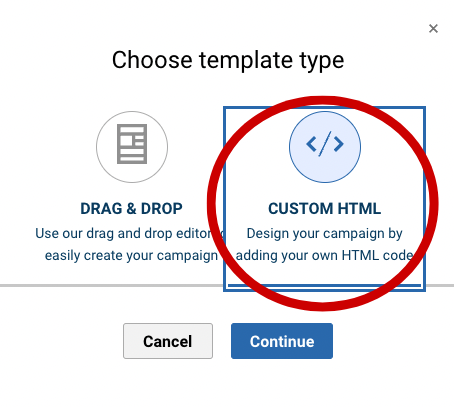
5. Select “custom HTML”
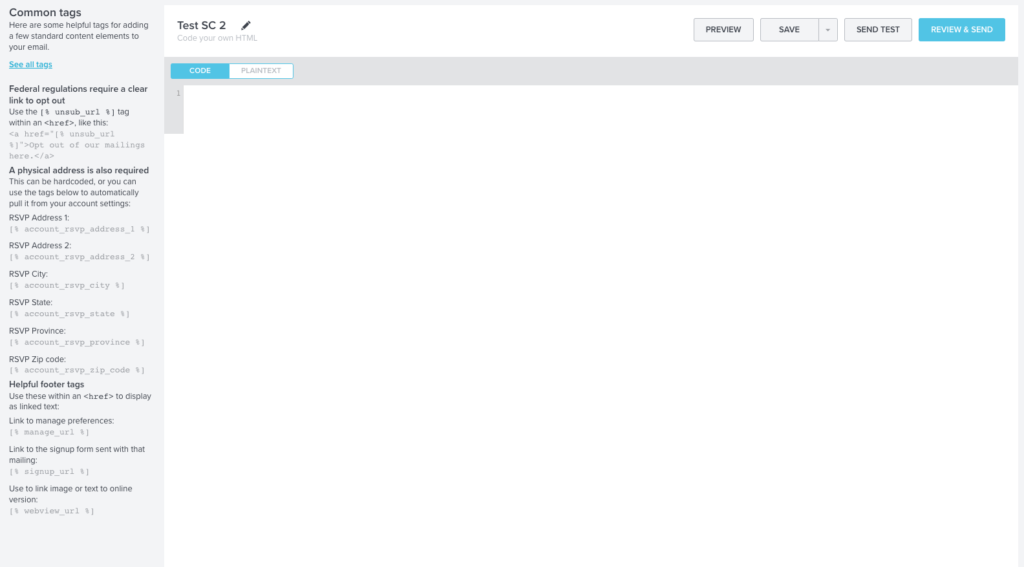
6. Enter HTML
Delete existing code in the editor and then copy and paste the code from your newsletter. To get your code, create your mailing in the NC State Email Generator and then click the “publish” and “view the page” functions. Right-click in the center of the email, select view source, select all of the code and copy.
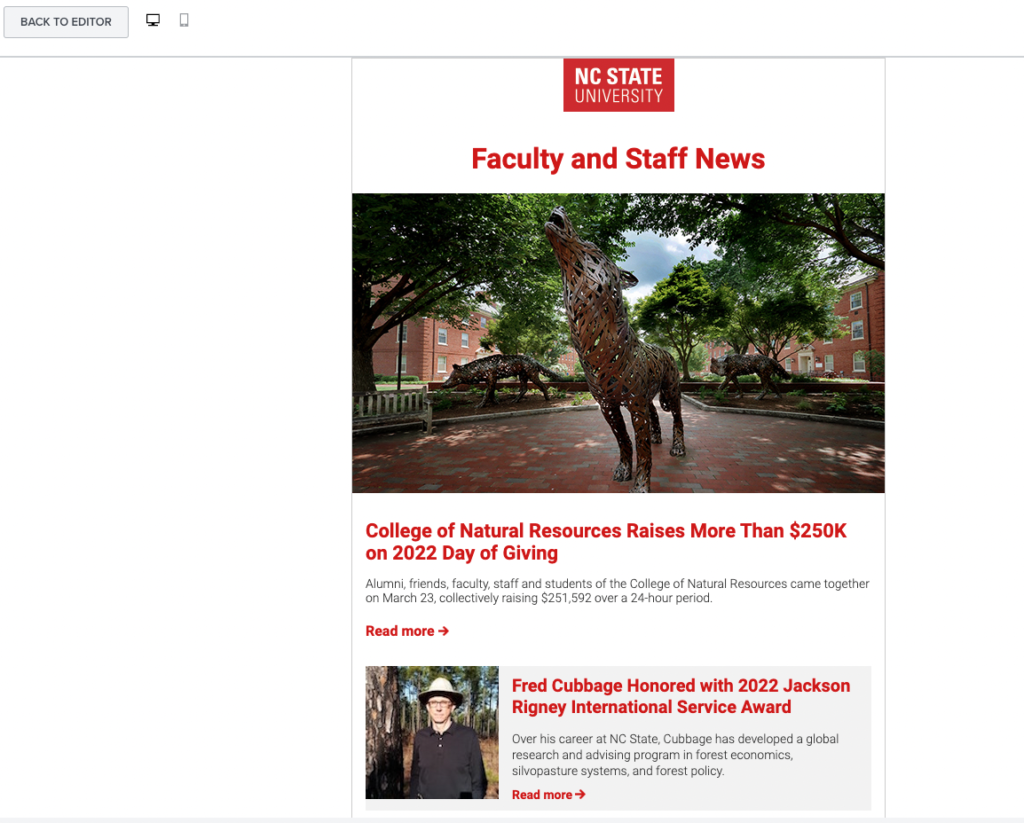
7. Preview your email
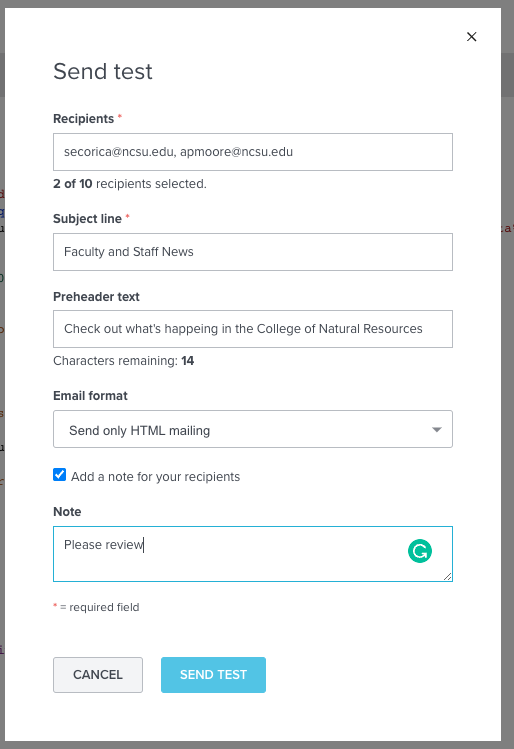
8. Send a test email
9. Send final
You will need to create your mailing group before sending an email. If you forget, you can save your draft, create your group and go back to your saved email under drafts.
Personalization Fields
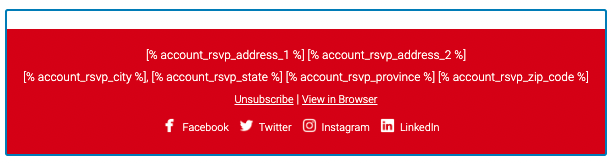
Personalization tags are code that you place within your email to customize the email for the recipient.
For example, the code [% member:first_name default=”NC State Prospective Student” %] inserts the recipient’s first name wherever this code is placed. If there is no first name listed for the member, the default value, in this case, “NC State Prospective Student,” is displayed instead of the first name. You can choose to insert any custom field in your audience in addition to generic options such as dates and unsubscribe/manage subscription URLs.
Since most of our content building is done in the NC State Email Generator, you might have to add the code after you paste it into Emma. You would put the code where you want the customized field to appear.
To test, you must send a test email to yourself or someone else, since it has to dynamically show the fields based on a user’s information. The preview mode will not work to verifiy it is working.
Resources
- To find what code you need to use, review this List of Emma Personalization Tags.